INSTALLATION PRIMAVERA PROJECT CONTROL

Via the App Store the Primavera Project Control app is available. The store shows sample printscreens as well as possibilities to navigate to the support page and userguide.
Hit "Get It Now"
Power Bi will ask you if you would like to install the app. Please note that the installation will be done inside of your tennant. Data processed via the app won't be feasable for anyone outside of your organization.
You can download the Primavera Project control app via your PowerBi environment. Use search "template apps" and search for "primavera".

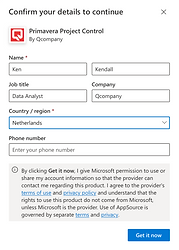
You need to confirm your details to be able to download the app. Information is not shared with third party and only used by Microsoft and Qcompany for support purposes.
Hit "Get It Now"


UPLOAD YOUR XER TO ONEDRIVE/SHAREPOINT
Once you have downloaded the app the dashboards are shown using sample data. The app shows the message "You're viewing the app with sample data. connect your data".
Before you can connect your data you need to export a xer file from Primavera and save this on your sharepoint/Onedrive.


STEP 1: EXPORT FROM PRIMAVERA A XER FILE
You can view the online Oracle documentation on how to export a XER file .Dependent if you are in Primavera On premise Professional or in EPPM the navigation and loon-and-feel may vary.
Basically, you navigate to the export button and select the option Primavera PM – XER.
You could select any version but best to stick with the latest possible in your instance.
The export Type you need to select is “Project”
Now save you XER to your devise so it can be uploaded to your OneDrive location.
STEP 2: SIGN INTO ONEDRIVE/ SHAREPOINT
You can navigate to Onedrive/ Sharepoint on various ways.
-
Via Office365 look for the OneDrive App (and if not available search in apps).
-
If you cannot find OneDrive/Sharepoint via the office365 you could navigate to https://onedrive.live.com/about/en-gb/signin/


STEP 3: FIND THE CORRECT URL
The URL for a user's OneDrive is usually in the following format:
https://<tenant name>-my.sharepoint.com/personal/<user principal name>
For example, for an email / username in office 365 like this rsimone@contoso.com the URL for onedrive personal would be:
https://contoso-my.sharepoint.com/personal/rsimone_contoso_com
You need this url when connecting in PowerBi!
Note: for the user principal name (UPN), any special characters such as a period, comma, space, and the at sign ("@") are converted to underscores ("_").
STEP 4: CREATE FOLDER
You need to create a folder named "XER" in the onedrive rootfolder.
In this folder you can upload the xer file (see next step).


STEP 5: UPLOAD XER FILE
In your OneDrive you can upload your exported XER file from your Primavera instance. Use the upoad button to load your xer file into the folder "XER".

CONNECT YOUR DATA

STEP 6: CONNECT YOUR DATA
Once the app is installed you will see the app using sample data. You can use the app showing your data from the XER file stored in the folder XER on Onedrive.
Use "connect your data" to connect the app with your xer file.
Enter the OneDriveDirectory URL:
https://<tenant name>-my.sharepoint.com/personal/<user principal name>
For example, for an email / username in office 365 like this rsimone@contoso.com the URL for onedrive personal would be:
https://contoso-my.sharepoint.com/personal/rsimone_contoso_com
One in the next button Power Bi will ask you to sign in and check the authentication method plus privacy level.
Once the sign in and connect button is hit you will be guided to the app and the refresh of data will be started.

Please note that for the first time the refresh could take up to a couple of hours.
If you encounter any issues please check our FAQ section or drop an email to sales@powerprojectcontrol.com